Sunday, May 31, 2020

helicopters circling overhead....

Living downtown a few blocks from the protests which were overtaken with the rioters.....
a few broken windows, sidewalk and building grafitti
curfew in effect all week
and the helicopters circling overhead, keeping watch over the university....


on a closer level, the beams arrived.  you can learn a lot on the internet like how to lift them into place. each one weighs over 175lbs. and they have to go up about 15 feet so....pullys, cable and two come alongs (little jack-like very handy tools) did the trick.
next will be the roof support beams ( I forget their technical names).

And luckily, the dark clouds boiled over every day but it was too hot to rain.


and I found this when I thought I had a rock in my shoe....


nope, this tree thorn had penetrated the bottom and came up through the sole.  No injuries but it was really difficult to pull out and I was about 5 blocks from home


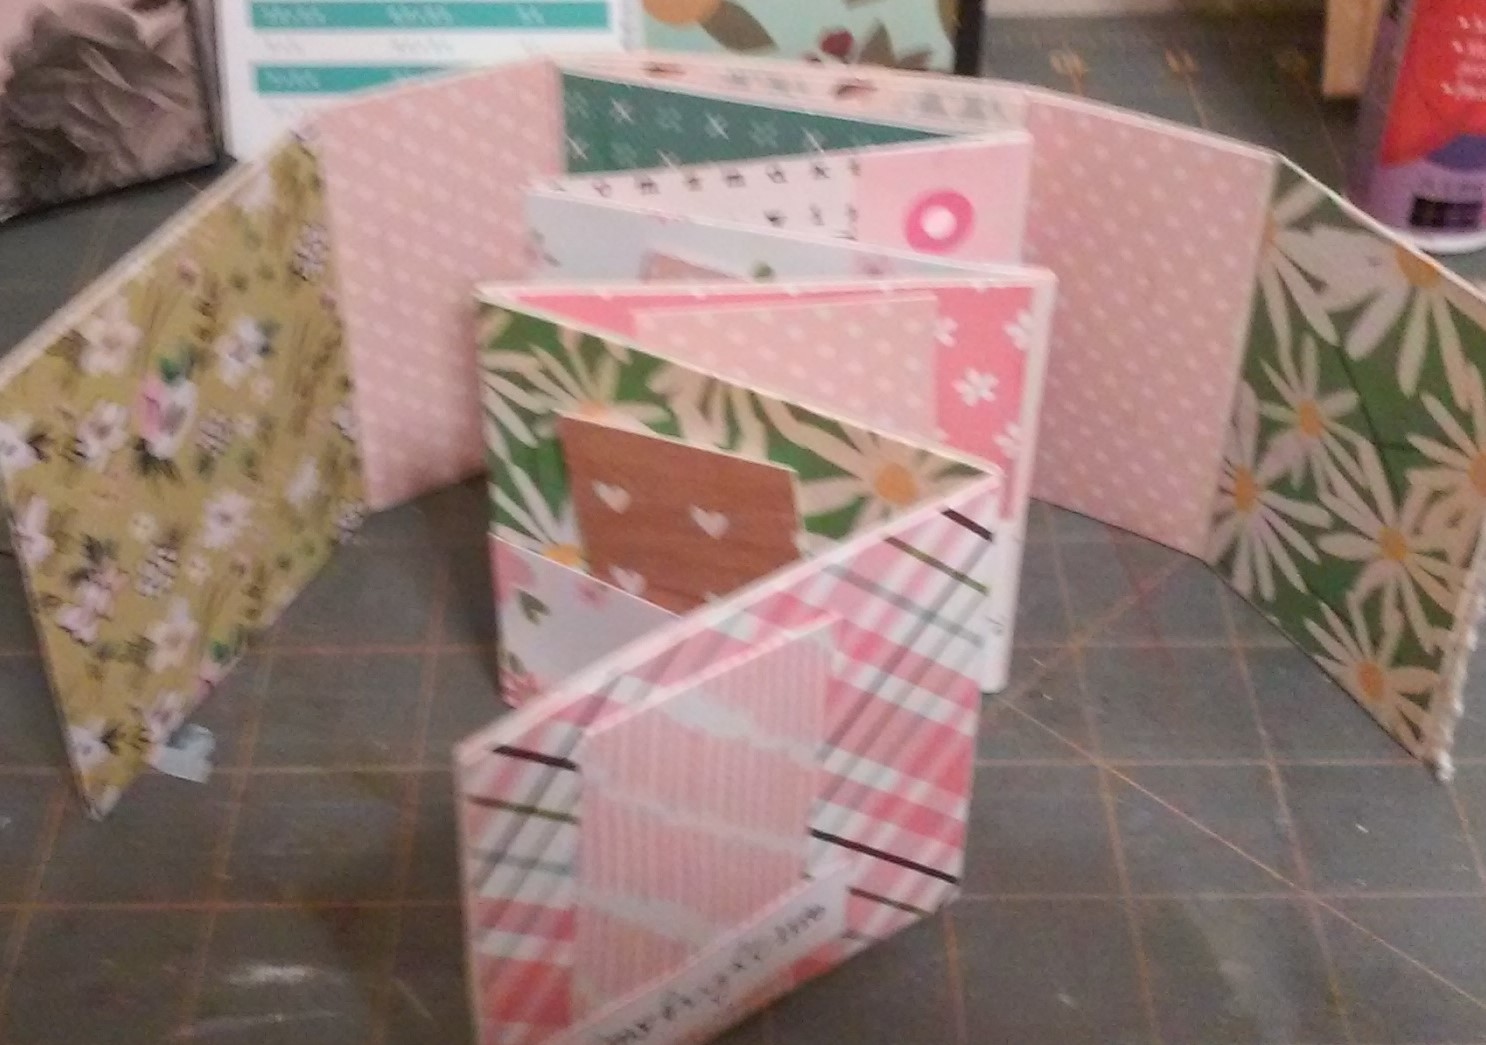
And, the second little journal, this time using dec.paper as the base.....

and after adding tucks, and folds, ribbon and tags


little flaps here and there.....


Next up will be another fun fold card....
In a world of chaos...
margie


Tuesday, May 26, 2020

quick as you want project!

Having some fun with a "one sheet" journal.....(well, one sheet for the base)


cover - fabric spine makes it easy to hide the paper folds and it lays mucher nicer than paper

inside pages with pockets, flaps, tuck spots and little clusters

tags, buttons and lace

layers of paper

little "chit-chat" words

lots of places for your own touch!


next up is trying another one using decorative paper as the base.....
12 x 12 paper turns into a 3 x 6 journal

stay cool, stay healthy.....
margie


Wednesday, May 20, 2020

speckled egg

hmmmm....looks pretty nice to me, how about you? The newest in the Distress family of colors.


two finished tiny books - about 2.5 x 3.5

decided not to worry about the covers or closure.
this works very nicely

the inside is finished...this is the book on the left

and this is the book on the right
I have three more to finish....now I'm thinking I may need the Eileen tiny book die......

And, yesterday I had a very fun time creating a new (to me) envelope card.  If I knew when we would be in Michigan and if I would be able to have a class (or two), this would definately be one.  I mean it, its really cute and very versatile: any age/any reason....hmmmm what to do????


And I have another ready to try....

Hope you are all safe from Covid and floods.  The news out of the Midland area is sad to hear and see.  Water is so very powerful...

Sunday, May 17, 2020

update here


walls are up...beams arriving tuesday

check out the paper

little books in the making - felt like constructing a book and got a little carried away.

accordion folds with added signatures in the valley folds


adding papers to the insides and still thinking of closures and cover embellishments.  I may just put them in a little library (we have two in the neighborhood) for people to use and enjoy.

hard to believe Memorial Day is just a week away.  We've never not been home for this holiday...


Thursday, May 14, 2020

what's happening here

it started with this

then came the footings and block

the framing

plywood walls

a little help from neighbors and the first wall is up for our storage shed!

and these started out with slide holders, got covered with paper
a photo was added and glued closed

dresden trim, seam binding, heart charm and wire
along with a little word or two


finished the back and ready to send to some
special friends!


Our "Fly By" is today at 2pm with the Air Force and National Guard.
Last call for card kits!  Interested? 
margie

Wednesday, May 6, 2020

wohoo!!

four loads done!!😀😀😀


102.6 degrees outside 😅😅

good news though next week the hi's are way down to the low 90's.
yep, that makes a difference when we got some shed buildin' to do!

yippee!!

the washer and dryer are being installed as I type!!
I'm not sure I've ever been so excited to do laundry!!
3 weeks and a few hand washings in the kitchen sink.....
we're ready for some clean clothes!!


Monday, May 4, 2020

another scrap buster


started with some heavy cardstock measuring 3 x 11, scoring @ 3, 4.5, 7.5, 9 (used 110lb mixed media paper)

added 2 pcs of lightweight cardstock a bit smaller than 3 x 11 and scored @ 3, 6,  9 ( used 90 lb paper from Michaels)
overlapped the smaller sections, making this page the same size as the rest and glued them together.
picked out lots of paper  and went to town decorating and embellishing.
just have the closure,  and a few more bits and bobs.
made for a fun hour!

Sunday, May 3, 2020

a step card differently


start with an 8" sq. pc. of cardstock

line up one edge @ 1 1/4 on your paper cutter and make a slice from 3/4" to 4 3/4" on both sides
Score from edge to the cut @3/4,  1 1/2, and 4 3/4 on both sides
Score @ 4" between the cuts


accordion fold the scores, beginning and the bottom and the should move into this shape


embellish


stamp a message inside

this card measures  4 x 8 when folded

If you haven't created a step card before you can google and lots of videos will appear to guide you through the process.
A fun way to use up scraps of your favorite papers.  You know those pieces you just couldn't throw away. 
😉😉


Friday, May 1, 2020

good news!

I found the Big Shot and it only took 4 hours and 2x going through all the boxes (aobut 60 or so).

So, I will have to finish this cute project another day but you can get an idea.

Its a cute little frame.  You can make it any size.  Mine has an opening of about 3 3/4 inches.

chipboard
one 5 x 5
4 pcs 1 x 6
one pc. 1/4 x 4 5/8 and 2 smaller pcs (not shown)

 cardstock
one pc 7 x 7 (white)
designer paper
one pc. 4 7/8 square
4 pcs 1 x 8

glue chipboard to center, trim out corners and wrap all 4 pcs
do the same with the white cs. and square

you will have something like this

add designer paper to back of square pc.

align frame pcs together using straight edge and grid and glue

add thin chipboard pc as a spacer to back of frame - make sure to glue so back pc will cover it
add glue and attach square pc on top
I added 2 smaller pcs to the top corners after gluing the bottom for more security
** put them on the outside area so a picture can easily slide into frame


come back again to see how I embellished. 
easy to change up the opening by adjusting the frame lengths and back pc.

Now all I have to do is find my photo paper, print out a photo and slide it inside for a great Mothers Day surprise.
Very mailable which is very important to me!


or you can use a cut apart - include a set that can be changed out!